3.EPUBの編集、扉ページの作成
InDesignから書き出したリフローレイアウトのEPUBに、扉ページを設けたい場合があります。
その手順を覚え書きしておきます。
扉ページの画像データの準備
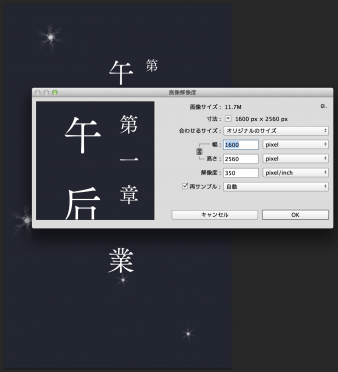
9章まであるので扉ページ用の画像データを9つ準備しました。編集用にPhotoshop形式での保存と、EPUB用にJPEG形式で準備します。画像サイズは1600×2560pxとします。
JPEG形式で書き出したファイルは解凍したEPUBフォルダのOEBPSフォルダ内のimageフォルダに移動しておきます。
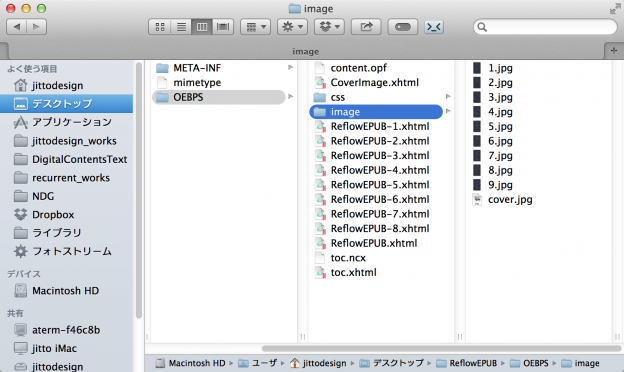
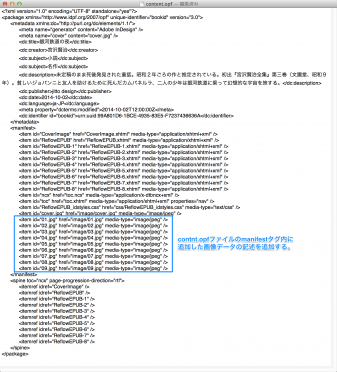
EPUBフォルダ内にファイルを追加したので、content.opfファイルのmanifestタグに追記しておきます。
<item id=“01.jpg” href=”image/01.jpg” media-type=”image/jpeg” />
<item id=“02.jpg” href=”image/02.jpg” media-type=”image/jpeg” />
<item id=“03.jpg” href=”image/03.jpg” media-type=”image/jpeg” />
<item id=“04.jpg” href=”image/04.jpg” media-type=”image/jpeg” />
<item id=“05.jpg” href=”image/05.jpg” media-type=”image/jpeg” />
<item id=“06.jpg” href=”image/06.jpg” media-type=”image/jpeg” />
<item id=“07.jpg” href=”image/07.jpg” media-type=”image/jpeg” />
<item id=“08.jpg” href=”image/08.jpg” media-type=”image/jpeg” />
<item id=“09.jpg” href=”image/09.jpg” media-type=”image/jpeg” />
扉ページ用のXHTMLファイルの作成
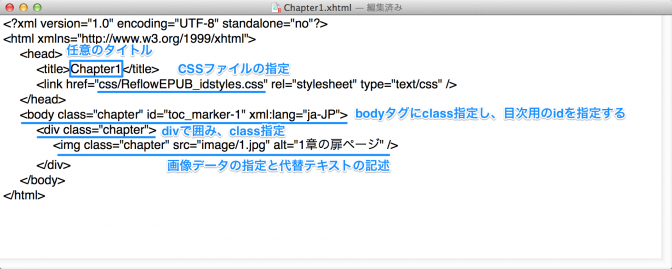
扉ページ用のXHTMLファイルを作成します。テキストエディットまたはWebオーサリングソフトで新規ファイルを作成します。
下記のように記述します。(1章の場合)
<?xml version=”1.0″ encoding=”UTF-8″ standalone=”no”?>
<html xmlns=”http://www.w3.org/1999/xhtml”>
<head>
<title>Chapter01</title>
<link href=”css/ReflowEPUB_idstyles.css” rel=”stylesheet” type=”text/css” />
</head>
<body class=”chapter” id=”toc_marker-1″ xml:lang=”ja-JP”>
<div class=”tobira”>
<img class=“chapter” src=”image/1.jpg” alt=“1”章の扉ページ />
</div>
</body>
</html>
保存する際には、拡張子を「.txt」ではなく、「.xhtml」とします。拡張子は「.txt」ではなく「.xhtml」とすることに注意しましょう。標準テキストのエンコーディングは「Unicode(UTF-8)」とします。
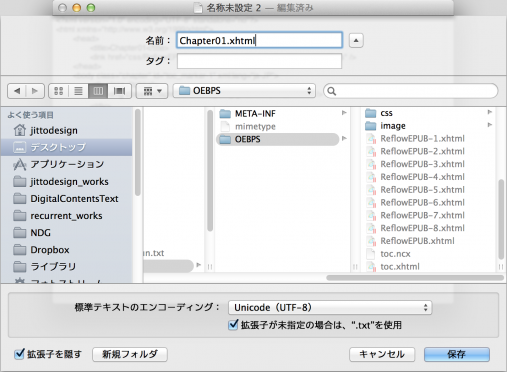
拡張子を「.xhtml」としたので、拡張子の選択画面が表示されるので、「“.xhtml”を使用」をクリックします。

2章〜9章は先ほどのファイルを別名保存して章番号の数字だけ変更していきます。テキストエディットで「別名で保存」するには、optionキーを押しながらファイルメニューから「別名で保存」を選びます。
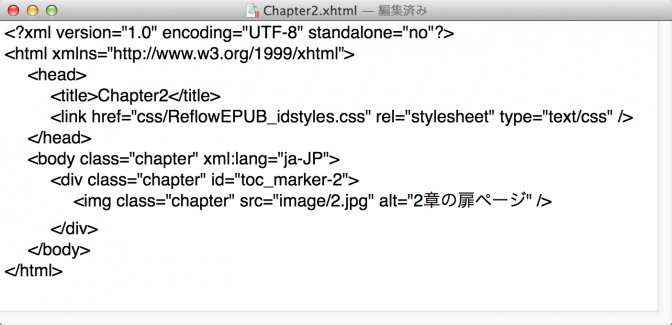
<2章の例>
<?xml version=”1.0″ encoding=”UTF-8″ standalone=”no”?>
<html xmlns=”http://www.w3.org/1999/xhtml”>
<head>
<title>Chapter2</title>
<link href=”css/ReflowEPUB_idstyles.css” rel=”stylesheet” type=”text/css” />
</head>
<body class=”chapter” xml:lang=”ja-JP”>
<div class=”chapter” id=”toc_marker-2″>
<img class=”chapter” src=”image/2.jpg” alt=”2章の扉ページ” />
</div>
</body>
</html>
bodyに指定したclass名を覚えておきます。(例では、chapter)
divに指定したclass名を覚えておきます。(例では、chapter)
imgに指定したclass名を覚えておきます。(例では、chapter)
扉ページ用XHTMLファイルのためのopfファイルの編集
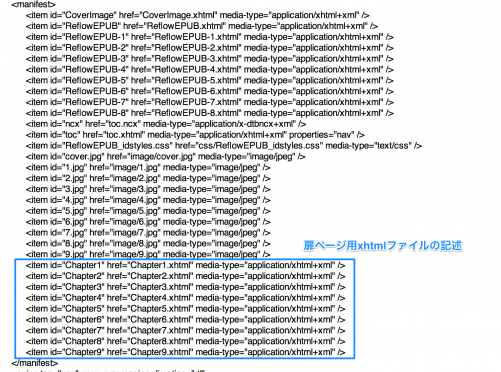
扉ページ用のChapter1.xhtml〜Chapter9.xhtmlファイルを追加したので、opfファイルを編集します。
content.opfファイルをテキストエディットかWebオーサリングソフトで開き、manifestタグ内に扉ページ用xhtmlの記述を追加します。
<item id=”Chapter1″ href=”Chapter1.xhtml” media-type=”application/xhtml+xml” />
<item id=”Chapter2″ href=”Chapter2.xhtml” media-type=”application/xhtml+xml” />
<item id=”Chapter3″ href=”Chapter3.xhtml” media-type=”application/xhtml+xml” />
<item id=”Chapter4″ href=”Chapter4.xhtml” media-type=”application/xhtml+xml” />
<item id=”Chapter5″ href=”Chapter5.xhtml” media-type=”application/xhtml+xml” />
<item id=”Chapter6″ href=”Chapter6.xhtml” media-type=”application/xhtml+xml” />
<item id=”Chapter7″ href=”Chapter7.xhtml” media-type=”application/xhtml+xml” />
<item id=”Chapter8″ href=”Chapter8.xhtml” media-type=”application/xhtml+xml” />
<item id=”Chapter9″ href=”Chapter9.xhtml” media-type=”application/xhtml+xml” />
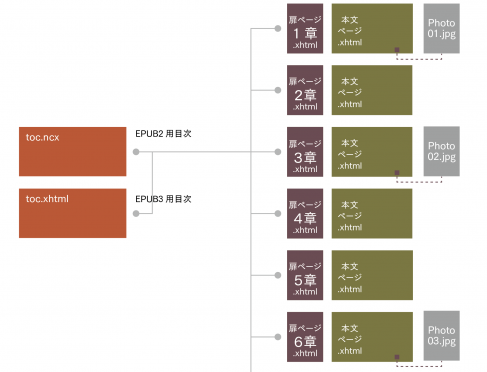
EPUBの表示順の変更
元のEPUBでは、「ReflowEPUB-1.xhtml」〜「ReflowEPUB-9.xhtml」の順番で表示されましたが、扉ページを設けたので下記の順番で表示させるように変更していきます。
- カバーページ
- 1章の扉ページ
- 1章の本文ページ
- 2章の扉ページ
- 2章の本文ページ
- 3章の扉ページ
- 3章の本文ページ
- 4章の扉ページ
- 4章の本文ページ
- 5章の扉ページ
- 5章の本文ページ
- 6章の扉ページ
- 6章の本文ページ
- 7章の扉ページ
- 7章の本文ページ
- 8章の扉ページ
- 8章の本文ページ
- 9章の扉ページ
- 9章の本文ページ
content.opfファイルをテキストエディットかWebオーサリングソフトで開き、spineタグ内の記述を下記のように変更します。
<itemref idref=”CoverImage“ />
<itemref idref=“Chapter1“ />
<itemref idref=“ReflowEPUB“/>
<itemref idref=”Chapter2“ />
<itemref idref=”ReflowEPUB-1“ />
<itemref idref=”Chapter3″“ />
<itemref idref=”ReflowEPUB-2“ />
<itemref idref=”Chapter4″“ />
<itemref idref=”ReflowEPUB-3“ />
<itemref idref=”Chapter5“ />
<itemref idref=”ReflowEPUB-4“ />
<itemref idref=”Chapter6“ />
<itemref idref=”ReflowEPUB-5“ />
<itemref idref=”Chapter7″ />
<itemref idref=”ReflowEPUB-6“ />
<itemref idref=”Chapter8“ />
<itemref idref=“ReflowEPUB-7“ />
<itemref idref=“Chapter9“ />
<itemref idref=“ReflowEPUB-8“ />
本文ページの見出しの削除
扉ページに章タイトルを作成したので、本文ページの見出しは不要になります。本文ページのxhtmlファイルを開いて、h1タグを削除していきます。
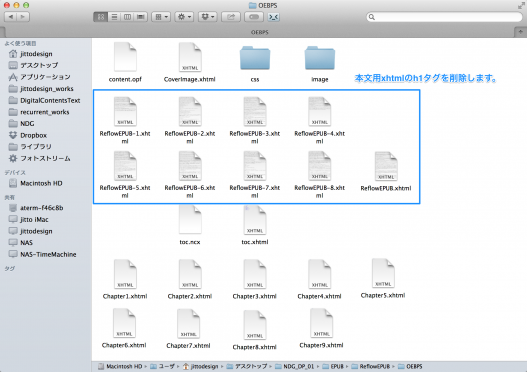
本文用xhtmlファイルをテキストエディットかWebオーサリングソフトで開き、h1タグの行を削除します。

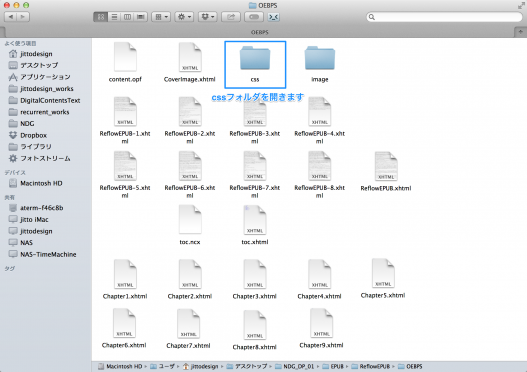
CSSファイルの編集
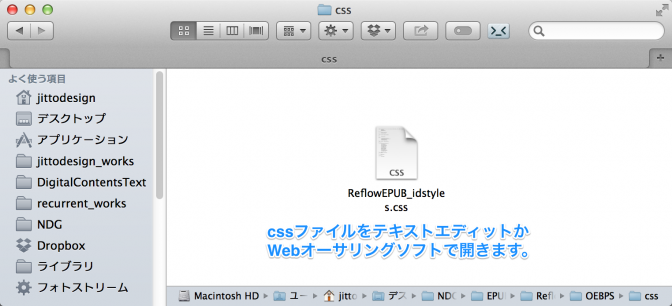
扉ページの表示をコントロールするためにCSSファイルを編集します。OEBPSフォルダ内のcssフォルダを開きます。
cssファイルをテキストエディットかWebオーサリングソフトで開きます。
本文ページのxhtmlファイル内のh1タグは先ほど削除したので、cssファイル内のh1も削除します。
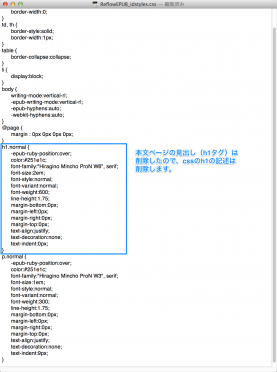
削除後のcssファイル
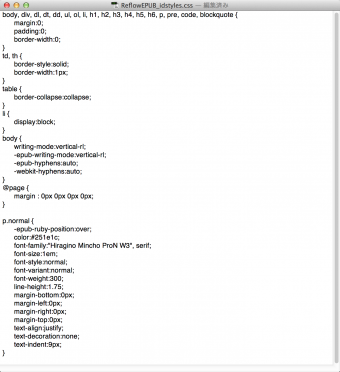
扉ページ用のcssを記述します。
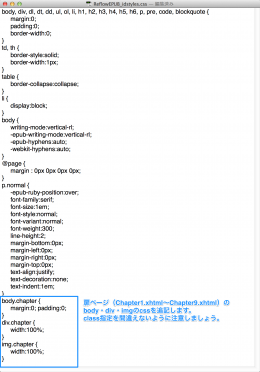
扉ページのxhtmlファイルのbody.(class名)、div.(class名)、img.(class名)のcssを追加します
body.chapter {
margin:0; padding:0;
}
div.chapter {
width:100%;
}
img.chapter {
width:100%;
}
追記したら、保存しておきます。
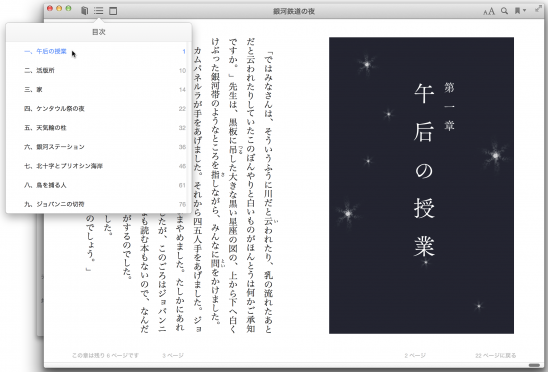
目次ファイルの編集
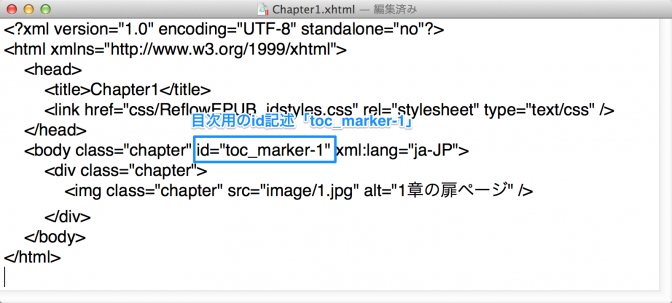
目次ファイルは本文用のxhtmlファイルのtoc_markerとリンクされているので、扉ページ用のbodyタグに記述した「id=”toc_marker-1」(1章用)〜「id=”toc_marker-9」(9章用)へとリンクを変更します。
扉ページ用xhtmlのid=”toc_marker-1″
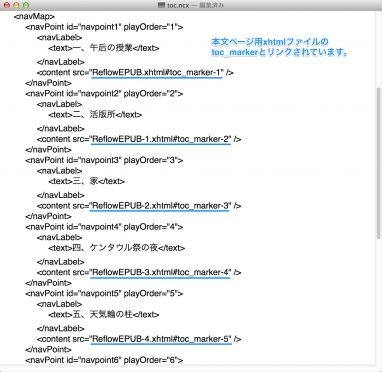
まずはEPUB2用の目次ファイル「toc.ncx」の記述を修正します。「toc.ncx」をテキストエディットまたはWebオーサリングソフトで開きます。修正前は本文用xhtmlファイルのtoc_markerとリンクされているのが確認できます。
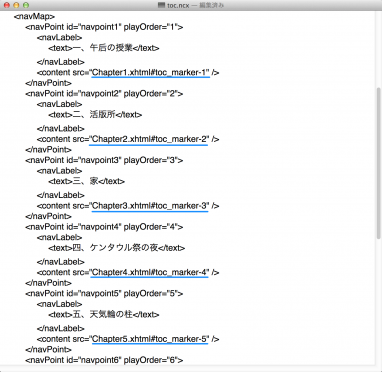
リンク先を扉ページ用xhtmlファイル(Chapter)のtoc_markerに変更します。
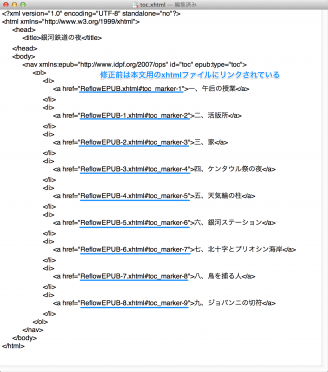
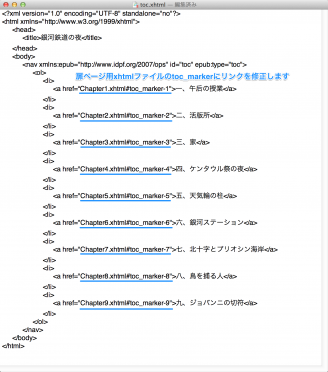
次にEPUB3用の目次ファイル「toc.xhtml」を修正します。先ほどと同様に元の目次は本文用のxhtmlファイルのtoc_markerにリンクされているので、扉ページ用のxhtmlファイルのtoc_markerにリンクを修正します。
修正前のtoc.xhtml
修正後のtoc.xhtmlファイル
目次をタップすることで章の扉ページにジャンプするようになります。